

Buy anything from 5,000+ international stores. One checkout price. No surprise fees. Join 2M+ shoppers on Desertcart.
Desertcart purchases this item on your behalf and handles shipping, customs, and support to Indonesia.
🚀 Tiny Programmer, Massive Potential: Power your microcontroller projects with a USB plug!
The Tiny AVR Programmer by SparkFun is a compact USB device designed to program ATTiny45, ATTiny85, and other AVR microcontrollers effortlessly. It features dual ISP headers, direct USB connectivity, and female pin headers for easy prototyping. Compatible with the Arduino IDE, it enables developers to miniaturize their projects while maintaining full programming control.
| Asin | B00B6KNJRY |
| Best Sellers Rank | #463,878 in Industrial & Scientific (See Top 100 in Industrial & Scientific) #169 in Programmable Logic Circuits |
| Brand | SparkFun |
| Compatible Devices | ATTiny45 and ATTiny85 |
| Connectivity Technology | USB |
| Customer Reviews | 4.4 4.4 out of 5 stars (171) 4.4 out of 5 stars |
| Item Weight | 0.03 Kilograms |
| Manufacturer | Sparkfun |
| Memory Storage Capacity | 8 KB |
| Mfr Part Number | PGM-11801 |
| Model Name | PGM-11801 |
| Model Number | PGM-11801 |
| Operating System | FreeRTOS |
| Processor Brand | Atmel |
| Processor Count | 1 |
| Ram Memory Installed | 8 KB |
| Ram Memory Technology | SRAM |
| Smart Home Compatibility | Not Smart Home Compatible |
| Total Usb Ports | 1 |
| Unit Count | 1.0 Count |
| Upc | 700112246517 757347352919 |
User
Great USB programmer for ATtiny85. Works on Linux! Compatible with Arduino IDE!
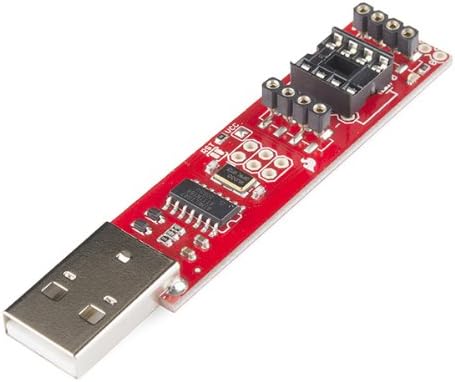
Great USB programmer for ATtiny85. Works on Linux! Compatible with Arduino IDE!In order to set it up, I would recommend looking up SparkFun "Tiny AVR Programmer Hookup Guide" on Google.However, note that the SparkFun instructions are targeted towards Windows users, so for Linux users I found that you need a few deviations. Here is the process that worked for me on Linux:1. Download and install Arduino IDE from the official website (as per Sparkfun instructions)2. Download ATtiny Addon, find hardware/ folder of your Arduino installation and copy attiny content there (as per Sparkfun instructions)3. Launch Arduino IDE4. Plugin the Tiny AVR programmer with ATtiny85 already inserted (check the polarity as per Sparkfun instructions!)5. Good news -- you are on Linux! The device is recognized automatically, no USB driver installations are necessary6. Check that the device is discovered:$ sudo lsusbIn my case, I see this line that shows that the system sees a new USB device:Bus 002 Device 120: ID 1781:0c9f Multiple Vendors USBtiny7. Note the device's 'Bus' and 'Device id', we will use it to allow all users a permission to write to this device (otherwise, your uploads will fail on Linux since you have no permission to write to the device). In my case, the command is:$ sudo chmod 666 /dev/bus/usb/002/1218. Copy/paste the simple blinking sketch into Arduino IDE (as per Sparkfun instructions). Don't upload the sketch yet!9. In the menu "Tools", pick the following:* "Board" -> "ATtiny"* "Processor" -> "ATtiny85"* "Clock" -> "1 Mhz (internal)"10. Click "Upload" for your sketch (The first time, it will pop-up a window asking you where to save the sketch)11. Congratulations! Once upload is done -- you should now see the LED that is blinking every half a second!
User
Works great for Programming- Just be careful keeping the ATTINY in for prototyping
Super simple to use and worked great right away. I had the blink script running withim minutes.One word of caution when you are keeping your ATTINY plugged in and using the female headers for prototyping. I tried hooking this up to an I2C rtc and spent hours trying to get it to work. I finally came across a reviewers comment on the sparkfun website that said:"the board holds the SDA signal on Pin 5 HIGH during the acknowledge clock cycle which results in not being able to detect an Acknowledge (LOW) from a slave device. The SDA pin during the acknowledge clock cycle is configured as an Input."Not sure if this will cause issues other than with I2C - so keep this in mind.Once I removed the ATTINY and used a breadboard instead, everything worked as expected. I just wish I had seen that comment earlier and thanks to whoever wrote it.
User
Mine showed up busted. I hope to add a new review soon....
Kind of bummed out about this one. The board showed up with one row of the female pins bent down. Sure, I can pull them up but one of the leads that gets soldered to the board broke from the bend. I really don't want to have to re-solder up something that I paid for. Others have given this board a very good review so I'm hoping when I get one that is not broken I'll have success. When that happens I'll be happy to change my review ratings.----- UPDATE -----Amazon replacement came in lightning fast! We are talking very next day! And the replacement is in good shape and works perfect. I have a Mac running 10.12.6. Placed my ATtiny in this board and plugged the board into the USB slot of my computer. Everything worked fine. All good here now ;-)
User
Good but not foolproof
Build quality is great. Mine arrived functional and nice solder quality. Nothing bent.SparkFun Online Instructions are mostly good and well written, but outdated. If your are a noob but using Arduino IDE v. 1.8 then the SparkFun instructions may leave you frustrated because they point you to a GitHub for IDE 1.0 or 1.6 compatible adding, and I found those incompatible with IDE 1.8 (compiler issues.). If you use IDE 1.8 then search GitHub for “ATTinyCore” and use that, and then it’ll work. However, heed all other instructions and warnings about orientation, voltage, clock speed, etc from SparkFun.I would still recommend this programmer, as I assume anyone programming a Tiny is not a complete noob and can search and solve little problems. (I’m a noob and figured it out, so can you. Have fun!)
User
Another great Sparkfun component
Great little programmer. Does what it says and backed by typical Sparkfun drivers, documentation, and examples. Relatively inexpensive and useful for both ATtiny 45 & 85 series microcontrollers. The headers support easy prototyping and breakouts making this a full development solution beyond just a programmer.
User
Fantastic AtTiny Programmer at a remarkable price!
I should start by mentioning that Sparkfun is a great electronics company. They not only offer quality products at very good prices but, they also have great tutorials on their website for the use of these products. The reason I purchased this was to program some AtTiny85s that I had and to do it in a way that wouldn't cause damage to the chip, which frequently happened using an Arduino Uno to do the programming.I would highly recommend this product for anyone who is looking to shrink their electronic tinkerings down to impressively small sizes. The one issue that I had using this product was not actually the fault of the product itself but, more due to my poor instruction reading skills. If you want to program these through the Arduino IDE you must remember to burn the bootloader onto the chip. I didn't know this and spent a few hours cursing until I realized the fuses had not been properly set by the burning process.
User
Easy to use programmer.
Have an ATTiny you need to program? Then this is what you're looking for. It's super easy to setup. Not much else to say other than it's a great product!
User
Received and in good working order
Received the programmer yesterday and had my first Attiny85 programmed and working within a few minutes. Windows 10 64 bit accepted the driver (libusb-win32) using Zadiag.exe after plugging in the programmer. Board was found as FabISP. Setup the Arduino IDE (Ver: 1.8.13) for the Attiny85 @ 1mhz after installing board manager (attiny by David A. Mellis version 1.0.2) and burnt my first blink program. Even ran the bootloader after changing settings to 8mhz CPU speed and verified correct timing on delays. Programmed the 5 devices I had on hand. No issues along the way.
User
Not seen on a Mac M2 Mini Pro.
This little programmer is fantastic! I used it to upload code to an ATTiny85. When you go to the manufacturer’s website to set it up, the directions are a bit outdated. When it says no drivers are needed for Linux or Mac, I wonder if they’re referring to older Intel machines. My newer Mac Mini with the M2 Pro chipset just wouldn’t see the device. I had to use my Windows 10 tablet to set it up. The setup process on Windows was pretty straightforward once I figured out how to install the drivers. I would have given it 5 stars if it had worked on my Mac. I’m still trying to figure out why it doesn’t.
User
läuft auch unter Ubuntu 20.04
Macht was er soll - er programmiert ATTiny85Hinweis: Der ATTiny Programmer funktioniert auch unter Ubuntu zusammen mit der Arduino IDE. Dazu ist es allerdings notwendig eine udev-Rule zu erzeugen ( tgonet.de/blog/?p=2654 ).
Trustpilot
3 weeks ago
1 month ago