


Buy anything from 5,000+ international stores. One checkout price. No surprise fees. Join 2M+ shoppers on Desertcart.
Desertcart purchases this item on your behalf and handles shipping, customs, and support to Indonesia.
🚗 Tow Boldly, Tow Smartly — The Hitch That Means Business
The Draw-Tite 76439 Class 4 Trailer Hitch is a precision-engineered, powder-coated steel hitch designed specifically for Lexus RX350L (2018-2021) and Toyota Highlander (2014-2023). Rated for up to 6,000 lbs gross trailer weight and 900 lbs tongue weight, it exceeds rigorous V-5 and SAE J684 towing standards. Its 2-inch square receiver supports a wide range of towing accessories, while the custom fit and bolt-on installation ensure a hassle-free upgrade backed by a nationwide lifetime limited warranty.


| ASIN | B09KY9CNGH |
| Automotive Fit Type | Vehicle Specific Fit |
| Best Sellers Rank | #21,333 in Automotive ( See Top 100 in Automotive ) #47 in Towing Hitch Receivers |
| Brand | Draw-Tite |
| Brand Name | Draw-Tite |
| Compatible with Vehicle Type | Sport-Utility-Vehicles, Trailer, Truck, Van |
| Customer Reviews | 4.6 out of 5 stars 4,290 Reviews |
| Finish Type | Powder Coated |
| Included Components | Draw-Tite Trailer Hitch Class IV, 2 in. Receiver, Compatible with Select Lexus RX350L : Toyota Highlander |
| Item Type Name | Draw-Tite Class IV Trailer Hitch, 2 Inch Receiver |
| Item Weight | 16 ounces |
| Manufacturer | Draw-Tite |
| Manufacturer Part Number | 76439 |
| Manufacturer Warranty Description | Limited Lifetime |
| Material | Alloy Steel |
| Material Type | Alloy Steel |
| Maximum Towing Capacity | 7500 Pounds |
| Model Number | 76439 |
| Pull Force | 6000 Pounds |
| UPC | 016118160628 |
| Unit Count | 1.0 Count |
| Vehicle Service Type | Sport-Utility-Vehicles, Trailer, Truck, Van |
T**E
Bolts on without any drilling. High Quality Brand never disappoints
Draw-Tite's long standing excellent reputation for fit, strength and quality was well represented in this application. Installation without any drilling was a treat and went smoothly. The process of installation on my 2019 Colorado followed helpful comments by others that the bumper needs to completely come off for ease of the bolt up and wiring tasks. I would add that the bumper was not easy to free initially after all bumper attachment bolts were out. To free the bumper, I found a solution by backing out all four bolts holding the original GM cross-tube to the frame rails until the cross tube had dropped down from the frame rails and had about a 3/4 inch gap. The bumper could then be tilted/extracted such that it's end plates that side mount the bumper to the frame rails would come free off the ends of the cross tube bracketing. (The bumper sat nicely on the cross tube's original ball mount support without any bumper attachment bolts in place, so no concern for the bumper possibly falling free during all of that cross tube loosening.) Draw-Tite eliminated that cross tube bracket-end interference and provides washers to tape to the frame that fill in as shims the free space thickness where the new cross tube omitted the OEM's interfering cross tube bracket ends. You can fully bolt up and torque the Draw-tite hitch to the frame rails and afterwards slip the bumper easily in place. I used a long breaker bar with a chain link fence top rail tube section as a cheater pipe extension on it to break loose the two of the (four in total) bumper side-mounting bolts that my 90 degree air hammer could not get in to reach. It was a lengthy effort to back out those OEM-threadlocked bolts, but no heat was required, just patience and endurance. After many years of installing frame mounted hitches from several manufacturers and front-mount tow plate bracketing for vehicles towed behind motorhomes, it was a pleasure to still be able to purchase another Draw-Tite product that continues the high standard you expect from a trusted brand.
R**N
Good hitch easy install- Some install tips in the review.
Ok so I have a 2015 chevy colorado wt 4x4 that came with a bumper hitch. I needed to change ball size often for different trailers and so i decided to go with the receiver hitch to make that easier. The hitch fit good and was good quality. Tips - There are 8 big bolts and 2 small bolts holding the bumper and old hitch on. these will be rusted badly and you will need a long ratchet and a 21 millimeter socket for the 8 large bolts and the little ones are like a 12 or 13 mm. you should spray these through a hole in the frame area inside the rail to help with removal. These are in an area that is hard to access with a impact and they are extremely tight. they use some thread locker on them so hit them with a torch to free that up or it will be a tough battle. the 4 large bolts on the bottom were easy to remove with the large impact. the 2 center bolts have clips that will need to be put on the new piece. the old hitch ball has to come out before the bumper will come off. be sure to remove the wires that are attached to the bumper before removal. i used zip ties to reattach the wiring. i used a 3 foot 1" drive breaker bar to loosen these big bolts so get ready for some physical work if you tackle this yourself. Good luck
T**N
Easy to install and top quality
Expected nothing less from Draw-Tite with this high quality hitch. Easy to install and they provide bolt fishing lines to assist. You will either need a second set of hands or use a hydraulic floor jack like I did to raise the hitch up. Took me less than 30 minutes to install and held up as expected pulling my medium sized trailer. Highly recommend.
S**.
Fits well, looks great, easy install.
I installed this on a 2020 XC60 T6 Inscription with little issue. There are instructions included with good pictures for the install, and good videos are found on YouTube as well. The only issue that I ran into was the mounting brackets for the bottom of the bumper need to be bent back out of the way and then back forwards in order to re-align. This CAN (was) done by hand but took some effort. You also need to trim about an inch out of the bumper, this is easily done with a utility knight (be careful) and you can follow the 'guide' printed in the inside of the bumper itself. Plan for an hour, but honestly, if I had to do this again, it would take 20min...
J**O
Good Medium Duty Receiver for Toyota 4Runner
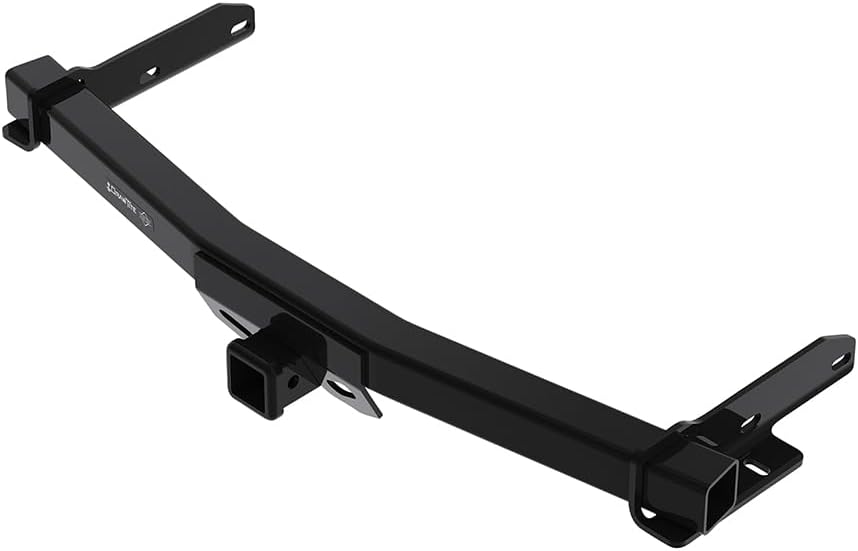
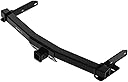
I bought this for my 2003 4Runner so that I could haul my car, and maybe eventually when I get dirty stinkin' rich, a boat. I have not towed anything so far, so at this time this review is solely on build quality and the installation. The package arrived pretty banged up, with tears all along the box. Everything was in tact, no missing hardware or instructions. This made getting the receiver out of the package very easy. The bracket that supports the towing wire harness was slightly bent on one flange, but not so much so that I could not attach the wire harness. All hardware and instructions are zip-tied to the receiver in a plastic bag. Instructions came in English, French and Spanish, and were printed front and back on an 8.5x11 sheet of paper (1 sheet for each language). This included instructions for both the Lexus GX470 and the Toyota 4Runner. The instructions were somewhat lacking, but with the exception of the handle bolts, the installation was pretty straight forward: Put bolts in holes. There were two minor setbacks: The aforementioned handle bolts, and the forward-most bolts. The handle bolts were SLIGHTLY bigger than the slots in the frame they were intended to go through, and the handles were difficult to manipulate. The slot being too small had a simple fix - GENTLY tap the nut through using a hammer. As for getting the nut to line up properly, good luck. The estimated installation time for this part was 35 minutes. I'm pretty sure I spent 35 minutes just getting the bolt threaded into this stupid thing - and that was only one of them. Hopefully you're more coordinated than I am. The issue with forward-most bolts was, like a few other reviewers, that the slots on the receiver didn't line up properly with the holes in the frame. The slots are about 1/8 inch inside of the holes in the frame (almost as if the frame was bent inward). Draw-Tite recommends putting the receiver in a vice and bending the flanges until they line up. What I ended up doing was, after bolting the receiver onto the frame, using C-clamps to get the holes to align. Some people mention needing a longer wire harness for their vehicles. I was able to use the factory harness just by removing the two separate harness plugs from the clips securing them to the firewall, and then cutting one additional tie down securing the harness to the firewall. The Receiver includes zip ties in case you want to tie them down more securely, but it was held taut enough for me. Lastly, I HIGHLY recommend wearing safety glasses for this. You WILL get dirt, dust and rust in your eyes if you don't.
T**E
Perfect Fit 2019 SR5 Tacoma Double Cab
Dont let the other reviews scare you away, thier fitment issues are due to them not installing it correctly. Short summary: product was shipped fast, absolutely zero damage on box or product. Install was a breeze I did it in 20 min by myself. Would definitely buy this asap. Down below I will give you Tips!!! Step 1: Take all 4 bolts and pre thread them in there designated spots (I took pics of the 4 I'm referring to). Run them in about halfway, they are hard to start, hence why you thread them in before you install!!!! Step 2: Take them back out lol Step 3: take the 2 rectangle washers and put them on the spring/wire they sent you to help install the bolts. Fish them through the hole and pull it through and get it in position. Then take the wire off Step 4: take the 2 smaller bolts and literally screw them into the spring part of the wire. Fish the bolt through the same holes as the washer. And pull the wire through the RECTANGLE washer and get the bolt to drop in the washer. (Way easier than it sounds) Step 5: take tow hitch and place it where it needs to go ( I layer on my back and held it up with my knees. Take the 4 bolts/washers that you already pre threaded and removed, and do 1 on one side and one on the other halfway. You'll be able to let go of the hutch once you have 2 bolts in on each side. Do the same with the remaining bolts. Step 6: tighten all 4 bolts almost all the way going from one to another on the other side!!! you want a little bit of play. Step 7: Take a small flathead screwdriver and put it between the hitch and the truck and hold the 2 smaller bolts you fished through in Step 4. Hold the bolt in place with the screwdriver and put on the nut. ( the screwdriver just holds the bolt so it won't rotate) tighten them all the way. Final step tighten everything down to spec. If you made it this far plz don't be alarmed. It sounds like a lot but is EXTREMELY easy. This kit has everything you need to install.
M**Y
Cheaply made
I just purchased this hitch it was a beast to put on as I was putting it on paint was chipping off of it it is not primed when they painted it so I can count on it rusting also the bolts are too short they give you a bolt and a washer to go on The bolts are too short and it's too hard to get them out to replace them I had to go and buy special nuts so they would work also they do not give you the two primary bolts that you have to take out from the factory you have to reuse the factory ones. Do not buy this hitch it is cheap the welds are not good was not pleased with my purchase at all. What can you do it's a pain in the butt to put on and I don't feel like taking it off I'll probably put another one in on in a couple of years.
V**E
Very Involved disassembly on WL, Can reinstall cover if installed properly.
Great hitch, Aligns easily, Very sturdy if you follow instructions and torque it down properly with a toque wrench, recommend adjusting it all the way in so you can reinstall the plastic cover from the factory, have yet to find a aftermarket bezel for the new Grand Cherokee WL, installation is not easy or simple and would recommend watching a YouTube video or bring it to the garage if you are not comfortable with possibly damaging the plastic clips, even with the video guide you will probably break a clip or two in the process like I did, when pulling back on the plastic painted bumper shell to remove it during the last step required a LOT of force, more than comfortable, ground clearance is good, doesn't really change anything as far as that, you wouldn't even know its there with the cover in place. If you have a bunch of warning lights on the dash after installation it's because you forgot to reconnect the connections underneath the tail light connections and you should be able to reach up and reconnect those without any disassembly. It won't align perfectly as far as width and when you tighten it down it will adjust the body of the vehicle and I've read that that is normal on unibody vehicles when installing a hitch.
Trustpilot
2 weeks ago
2 weeks ago