


❄️ Cool your CPU, heat up your game.
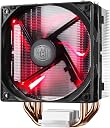
The Cooler Master Hyper 212 LED CPU Cooler combines four direct contact heat pipes with a high airflow PWM fan delivering 66.3 CFM at a whisper-quiet 31 dB. Its unique blade design and red LED lighting provide both performance and style, while the versatile mounting system ensures easy installation across Intel and AMD platforms.


| ASIN | B01KBXKP8W |
| Air Flow Capacity | 66.3 Cubic Feet Per Minute |
| Best Sellers Rank | #7,345 in Computer CPU Cooling Fans |
| Brand | Cooler Master |
| Brand Name | Cooler Master |
| Compatible Devices | Desktop |
| Cooling Method | Fan |
| Customer Reviews | 4.7 out of 5 stars 3,817 Reviews |
| Global Trade Identification Number | 04719512053379 |
| Included Components | Hyper 212 LED |
| Item Dimensions L x W x H | 0.9"L x 4.7"W x 4.7"H |
| Item Type Name | CPU Fan |
| Item Weight | 1.7 Pounds |
| Manufacturer | Cooler Master USA, Inc. |
| Material Type | Aluminum |
| Maximum Rotational Speed | 1800 RPM |
| Model | RR-212L-16PR-R1 |
| Noise Level | 31 Decibels |
| Number of Items | 1 |
| Part Number | RR-212L-16PR-R1 |
| Power Connector Type | 4-Pin |
| Product Dimensions | 0.9"L x 4.7"W x 4.7"H |
| UPC | 884102029486 |
| Unit Count | 1.0 Count |
| Voltage | 12 Volts |
| Warranty Description | 1 Year |
| Wattage | 2.28 watts |
J**N
The Cooler That Just Works
Sometimes the right answer is the boring answer, and the Hyper 212 LED is exactly that: reliable, effective, and sensibly priced. Four direct contact heat pipes pull heat off your CPU efficiently, and the PWM fan adjusts speed based on thermal demand, staying quiet during light use and ramping up only when it has to. Idle temperatures dropped noticeably coming from a stock cooler, and under sustained load the chip stays comfortable and far from throttling. The red LED fan adds a subtle glow inside the case. It is not a full RGB light show, more of a steady red accent. The LEDs are always on when the fan is running and cannot be disabled without modification, so keep that in mind if you want a blacked-out build. The universal bracket accommodates a wide range of Intel and AMD sockets, though fitting all the little hardware pieces takes a moment of focused attention. The manual is well illustrated and thermal paste is included, so you have everything you need out of the box. Solid performance, honest value, zero drama. Exactly what a budget CPU cooler should be.
J**H
Beast of a CPU Cooler
The Cooler Master Hyper 212 LED is a beast of a CPU cooler, both in size and performance (So far). It is a rather large cooler and you need to be aware of that when purchasing. It is very nice though. I was afraid after seeing it that it would hinder my RAM, but luckily I was in the clear with my set up (2x 8GB). However, for the future it would hard for me to have 4 RAM sticks. Just a heads up for the buyer. The LED on the Fan is not super bright (That is a personal preference though). With this model it comes stock with 1 Red Fan attached, but had an attachment bracket to add a second fan if you so choose to, I DID. A mild case of OCD hit me and I just didn't like just one fan, so I added another one to make it nice and even (Cooler Master SickleFlow 120). Whether or not it adds a performance boot is yet to be seen, but it looks cool. I would assume that it would help with the heat dispersion as it directs the heat towards the exhaust and away from the CPU faster. Assembly...... FOLLOW THE INSTRUCTIONS. It is fairly straightforward, but if you are not careful you can get ahead of yourself. Mine did come with a bracket that was Intel and AMD compatible, so you should be covered in either case. Overall, this is a excellent CPU cooler (given that it fits your set up). I will keep an eye on it to make sure the the performance is excellent as well and post back if it is not. Well worth the purchase as of now.
S**N
Easy to install + Superior cooling power
Found this on a black friday deal, so glad I did. I ordered the 2 pipe version from New Egg for the same exact price. This showed up faster thanks to Amazon's awesome 2 day shipping. This is a big heatsink, I was able to add a 2nd fan of my own as it had the brackets for it. Install was supper easy and to understand. It did come with thermal paste just enough to cover my AMD chip. This is double the size than the 2 pipe T2 version from new egg. The Red LED is perfect, not to bright and spins in a solid line and does not illuminate the entire case which was perfect for me, but if you are looking for more of a glow, this will not give it. Before my CPU was overheating and my system would shut off even though I had sufficient fans (6) total and liquid cooling. I ditched the liquid cooling (coolmaster 120mm) and installed the stock chip heatsink, that did a little better but would still over heat. I installed this Hyper 212 and instantly was able to go into BIOS and turn the fans from MAX to Normal, and boot to windows. My temp went from 62C - 89C down to 12C - 23C and I left my computer on over night with a full virus scan, the case closed and not once did it over heat. This fixed my heat issue and is pretty quiet!! I would order this type of heat sink again. The pipe feature was a great idea and disperses heat perfect. Thanks for reading and if you are looking to buy one, buy this, 10/10 easy install | 10/10 cooling power | also supports new chips both intel and amd.
A**A
Runs cool and quietly, the installation can be horrible.
I bought this to upgrade from my stock AMD cooler. I have a Ryzen 7 2700x overclocked at 4.0 GhZ, never went over since I didn't have a better cooler. I'll do Pros and Cons. Pros: It runs quietly: I have 3 fans on the case as well as this one and I didn't notice the noise level go up at all, the case fans, while quiet, are a little louder than this cooler. It's cold: My resting temps are around 23-24 degrees Celsius. While gaming, my temps never exceeded 43 Celsius. Occasionally when starting a gaming client or a game the temp would jump to 46 and immediately return to mid 30's/ low 40's. Cons: Terrible installation: The concept of mounting a bracket and screwing in the cooler isn't bad. However, the instructions had no words and only pictures. I attempted to install based on the pictures and I had to do it all over again after watching a YouTube video. First off, the mounting brackets each have to be facing a certain way towards the base of the cooler, I had one flipped. There are black covers that go onto the bracket to keep the screws from sliding around, I had to take the bracket off the MOBO and redo that. It's not hard to simply write out these small details that can make this experience easier for the user. Small con: The LED isn't very bright, but honestly, it's nothing I'm worried about. As you can see in the pictures, I have LED case fans that light up the whole case. All in all, this is a nice CPU cooler for the price. I would recommend it to anyone that wants to buy a nice budget cooler that can meet your gaming needs. But if CoolerMaster ever does another thing, I really hope it's adding more detailed instructions so nobody has to go through what I did.
D**H
Very nice fan, installation instructions are not for the first-timer, though.
OK, so it's kind of stupid to review something the day you install it, so take this with a grain of salt. My review will simply be about the installation process. Cooler Master's "instructions" for installing this fan are basically a bunch of pictures... not photos, just diagrams / drawings. If you have NO experience in dealing with or installing motherboards, then you probably will need help installing this fan onto the motherboard. Thankfully, there's Google and Youtube. I have installed mothboards / built computers three or four times, so I was pretty confident I could do the job. However, I'd never upgraded a CPU fan before, certainly not with one this massive. At one point, while following the instructions, I was confused by a photo. It seemed to suggest I should be using 4 screws to screw a bracket onto the board. The screws were supposed to come up from below the board, but it did not indicate which included screws those were. They didn't seem to be included at all. I thought perhaps they came from the current / old bracket that the old fan connected to on the motherboard, since I'd had to remove that earlier. It was only when I googled for instructions that I realized that a nearby photo that I thought I understood and kind of ignored.... showed that I was supposed to be installing a different bracket on the BACK of the motherboard first and I needed to attach that piece with the four screws I already had associated with it. So, it was partly my own fault, but it was also the fact that one or two drawings were unclear. A few words would have helped. But once I got past that hurdle, there was another one that had me scared at first: Would the RAM I was using "be in the way" of the fan, when I tried to install this fan inside my new Cooler Master Mastercase 5 on an MSI AM3 motherboard? I had asked questions here on Amazon about this. It was suggested that I measure the available space inside my case carefully. Well, I would have had to use a caliper to measure in order to predict how close this was going to be! First, I removed my RAM and finished adding the fan to the front of the heat sink. Then, I tried putting the first / closest RAM chip back. And, honestly, it was such a tight squeeze, I wasn't certain that the chip would be able to go into the slot. It seemed like I would need to bend the chip away during installation... that the fan was jutting out that far. However, with a bit of care, the chip went in. But, literally, THERE WAS NO WIGGLE ROOM. The RAM chip is basically AGAINST the front of the fan. I'm slightly concerned that if the fan ever starts vibrating, for whatever reason, the RAM will be vibrating too. But honestly, I don't see big odds of that happening. I'm including some photos of just how close the fan is to the RAM. Note that my RAM is a bit taller than most, because it seems like the RAM manufacturers put some sort of fins on it, probably to help with heat dispersion. Anyways, despite these minor issues, I'm still giving this fan a 5 star rating... because I'm very pleased with the price vs. value that I believe I am receiving. Initial stats suggest my PC is running about 10 degree Celsius cooler than before. And I've got a pretty LED too to go with my new Cooler Master Case (which, by the way, also came with drawings / diagrams-only instructions.) Thank you to all previous purchasers and their reviews! It's nice to buy with confidence!
E**N
Still running
So far a couple of years down the road, no hiccups. Running fine.
W**?
Basic looking but powerful
I used this on a 6700K. Anything beats the stock Intel coolers, but this heatsink actually kept it cooled well. I used ARCTIC MX-4 in pea method.
R**R
More Than Adequate for the Job
For a moderately priced cooler the Hyper 212 LED is more than adequate for the job with a TDP rating of 150W. It keeps my non-overclocked i7-9700K well below throttling temperatures. Quiet cooler and not annoyingly loud running at full RPM. Attaching the little bits to the mounting bracket can be a bit fiddly but not requiring a great deal of dexterity. The instruction manual is quite well illustrated and diagrams the installation process in adequate detail. As noted in a previous review the thermal paste should be applied just before mounting the cooler on the CPU and after all the brackets have been installed on the board. There are four red LEDs on each corner of the fan. These do not have a separate power cable and cannot be shut off. To disable the LEDs you probably have to cut the leads. The LEDs appear to be held in place with caps which may just pop out. The leads follow the supports for the fan hub. Cutting the leads will most likely void the warranty. Brackets, screws and rubber pads are included if you want to add a second fan. The XtraFlo PWM fan is no longer available as a separate item so if you want a matching second fan buy the Hyper 212 LED Turbo which comes with two fans. All in all a decent cooler at a moderate price.
C**N
trés efficace, très silencieux
Monté en remplacement du ventirad d'origine, sur un i5-9400 (6 coeurs, 6 threads), la température du CPU (mesurée avec OCCT) oscille entre 33°C à vide et 67°C à pleine charge (fin juillet, 28° dans la pièce). Le ventilateur tourne entre 700 trs/min et 1150 trs/min (donné pour 1600 trs/min maxi). Pour l'installer, il a fallu déposer la carte mère et fixer la plaque de support sous la carte mère. Avec le ventirad d'origine, la température commençait à 44° et montait, montait ...
L**N
too big
too big for my case
D**I
Cumpre o que promete
Chegou muito rápido, comprei na sexta a noite e chegou sábado de manhã, resfria MUITO bem, uso AMD então já deve saber que tenho um pequeno inferno dentro do gabinete, acompanha algumas peças adicionais caso vc queira colocar uma segunda ventoinha pra ajudar no resfriamento. lembre-se de medir seu gabinete pra ver vai caber dentro, no meu caso faltou dois dedos pra chegar no limite dele. Temp não passa de 50 graus.
L**E
Great for a quieter, cooler system.
When I thought through my new PC build I wanted a decent cooler, previously I went with an i7-6700 and used the stock fan that came with the processor. It was noisy and the constant drone of a fan speeding up and down, up and down was a bit off-putting. So this time I was planning on a decent cooler. Aside from that, I went for the i7-6700K, no particular want to over clock but the price was right and it did not come with a cooler anyway. I am no expert, let me make that clear. I did a bit of research and decided on this one as it was popular and the reviews were good. When it arrived I was really like 'OMG, what have I done...' The thing is huge! Thankfully, however, the instructions were good and I bought a case that was big enough to fit it, so just bear that in mind! It is a bit of a fiddle getting it set up correctly but not overly so. I would highly recommend that before you put the paste on the CPU that you ensure you have it all ready to screw down, I took a few attempts to make sure the four screws were in the right place. You can lift the screws and move them slightly as needed to make it line up just right. The whole point here is that the copper pipes suck up the heat and it spread into the heat sink where the fan blows the heat out. So make sure to place it on the CPU so that it blows the heat towards a fan that will extract the heat as quickly as possible. Despite the scary size having never used anything but a stock fan, it was not as difficult to fit as I was expecting and I am really happy with the results it is producing. On my old PC with an i7-6700 and stock fan, it could sit at 70/80C with the fan whining raiding in World of Warcraft. Now it is very, very quiet and never gets above 50C. Even if you're not so comfortable with me with these things it's not a complex task and has good rewards.
A**L
Perfetto
Beh che dire, funziona alla perfezione. L'ho montato su un i5 4670 da 3,40 GHz in quanto il vecchio dissipatore stock mi stava dando problemi, quindi ho deciso di spendere un po' di soldi per un dissipatore più performante ma anche più bello. Esteticamente lo trovo molto bello: mediamente poco ingombrante ma con una ventola che presenta un'illuminazione LED rossa, che se ben abbinata rende molto molto bello il proprio PC. Per quanto riguarda il montaggio non ho avuto particolari problemi, anzi, spiegazione e montaggio sono stati relativamente facili. Per quanto riguarda le performance, con il mio processore in IDLE la temperatura oscilla tra i 30 e i 33°C, mentre mettendo al massimo sotto stress il processore facendo rendering su Premiere Pro per lunghe sessioni sono arrivato al massimo a circa 55-56°C, che per quanto mi riguarda è più che soddisfacente. Non saprei però giudicare molto la rumorosità in quanto personalmente non lo trovo fastidioso, ma c'è da dire che nella quasi totalità del tempo che passo al PC indosso le cuffie, quindi il rumore non mi interessa.
Trustpilot
5 days ago
1 day ago