Desertcart purchases this item on your behalf and handles shipping, customs, and support to Indonesia.
🌟 Take control of your climate—because precision is power!
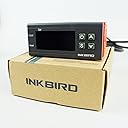
The Inkbird ITC-1000 is a versatile digital temperature controller featuring dual Fahrenheit/Celsius display, two relays for heating and cooling, and advanced safety alarms. Designed for professional DIYers and managers, it offers precise temperature calibration, compressor delay protection, and programmable settings in a compact, polished unit. Ideal for incubators, fermentation, mini-fridges, and more, it delivers reliable, energy-efficient climate control with easy integration.


| ASIN | B00OXPE8U6 |
| Additional Features | Programmable |
| Best Sellers Rank | #81,898 in Industrial & Scientific ( See Top 100 in Industrial & Scientific ) #91 in Temperature Controllers |
| Brand | Inkbird |
| Brand Name | Inkbird |
| Color | Gray |
| Connectivity Protocol | Push button |
| Connectivity Technology | Push button |
| Control Method | Touch |
| Control Type | Button Control |
| Controller Type | Hand Control |
| Customer Reviews | 4.6 out of 5 stars 2,498 Reviews |
| Display Type | Digital |
| Finish Types | Polished |
| Included Components | A temperature controller and a temperature probe |
| Item Dimensions D x W x H | 3.77"D x 3.93"W x 1.49"H |
| Manufacturer | Inkbird Tech |
| Manufacturer Part Number | ITC-1000 |
| Material Type | Metal, Plastic |
| Model Number | ITC-1000 |
| Mounting Type | DIY |
| Number of Items | 1 |
| Power Source | Corded Electric |
| Product Dimensions | 3.77"D x 3.93"W x 1.49"H |
| Product Style | English |
| Screen Size | 3.77 inches |
| Shape | Rectangular |
| Special Feature | Programmable |
| Specific Uses For Product | Heat Pump, egg incubator, fermentation |
| Temperature Control Type | Heating, Cooling |
| UPC | 709803350489 701056828906 701056809363 |
| Unit Count | 1 Count |
| Voltage | 110 volts |
| Wattage | 3 watts |
R**E
Perfect to revive an energy drink mini-fridge
Picked up a mid-2000s Red Bull countertop mini fridge. It worked and cooled, but would occasionally "chatter" the compressor on and off, causing it to stall and trip the overload switch. After checking the overload and motor starter, the cuplrit seemed to be it's electronic thermostat circuit board. Parts are unobtanium, so ultimately just tossed it and replaced it with the Inkbird. Wiring it in was a snap, just follow the diagram provided. It's fans are tied to the compressor (cool) power. The "heat" side was not used as this was for a fridge. The only slightly tricky part was the original temp sensor had a very different resistance than the one with the inkbird, however, the wiring for it was sealed into the unit via the foam insulation and couldn't really be removed- or a new one shoved through- without drilling a new hole through the insulation and steel case, which I wanted to avoid. I ultimately clipped off the wiring at the probe and the controller, spliced the Inkbird probe onto the wiring, slid it back into the original probe holder, and then attached that wire into the Inkbird. Reusing the original wiring through the case, but with the new probe at the end. Temp was reading correct. At that point, it was just a little trial and error playing with the set point and temp differential. For a drinks (well, mostly beer) fridge, this is what I found worked the best for ice cold beverages, without it excessively cycling on/off. Set point- 32* F Differential- 12* F (so, it will kick ON at 44*, and OFF at 32*). I've found at room temperature, this results is a roughly 30% duty cycle on the compressor- it runs for about 10 minutes, then is off for about 20). I've had no issues with even soft drinks freezing or being slushy- popping a can fresh out of the fridge and checking the liquid temp shows about 36*- or the "average" temp in the box. I left the compressor lockout at the default 3 minutes (the cycle time is much longer than that anyway, so it really should never be needed), and the temp "calibration" also at the default (zero), as I found it's reading to be spot on. For a fridge with fresh foods I'd probably keep the differential a bit lower for safety, but for canned beverages, a bit more fluctuation is fine. Saves power and wear/tear on the compressor with less frequent starts. It's been running for a couple months now with zero issue. The fridge pulls about 120 watts when it's running- or only about 1 amp, so the 10 amp rated relays in the Inkbird are more than sufficient, no additional relays or anything needed. That's quite a bit given it's size, only a little less than a full size residential fridge/freezer, but these little commercial drink fridges have relatively high cooling power (to recover/chill warm restock cans quickly from constantly being opened- this was originally intended to live on the counter of a gas station). Anyway for $20 it's a no brainer. Got a fridge/freezer with a bad controller? Or just want to be able to customize the set points? Get this.
A**C
Great T-stat, but a little difficult to wire in.
I was almost put off by the negative reviews, but I got this thermostat for my leopard gecko egg incubator. I needed something that would keep the temp at 88* F constantly. Although this T-stat was a little difficult to wire in initially, and required some parts it didn't come with (a plug, outlet, jumper wire), which is a small price to pay for such an inexpensive thermostat, it did it's job very, VERY well. I already have hatched healthy leopard geckos from two clutches, and I have another clutch that should hatch in about 3 days. The eggs are very healthy and this will be my first 100% hatch rate EVER. I also hatched cricket eggs in the incubator controlled by this T-stat. The T-stat has kept the temperature within 1.5* F in both directions constantly for several months now. I have been EXTREMELY happy with this product, so uch so that I ended up getting another one specifically for my cricket eggs. Same great results. Another great thing with this T-stat is that it's small size and convenient shape makes it very easy to build into whatever you are using it for, in my case an incubator. The only reason I don't recommend this for everyone who needs a T-stat is that wiring is a bit difficult. It requires at least some prior knowledge of electronics, and it's definately not "plug 'n' play". I definately wouldn't recommend anyone who doesn't have experience with electronics try to use this. You are dealing with 120v AC. Show some respect! But after it's wired in it works well. There are also two diagrams on how to wire it in, which are both feasible but it is a bit confusing. I recommend that you follow the colored diagram on the FAQs sheet included with the product, because with that diagram all the "hot" wiring is inside the unit. That will reduce the risk of shock, fire, etc. The yellow, ground wire on that diagram is unnecessary, though it is safer. Overall, it's a great thermostat for a great price. I will definately be using it again!
J**R
Amazing simple little controller for the price!
This is an amazing little controller for the price ($15! No way!) and for a simple dry contact calling for heat and one dry contact to call for cooling. Claims to have a 10A rated contact at 220 VAC. Pretty impressive, if true! I only use the “call for cooling” (close a contact) to turn on a radon reduction system fan with an inrush of 0.7A and 0.5A running current at 110 VAC for when the attic is above freezing. (When the warm, moist air from the sump pit hits the cold attic PVC pipe it generates a LOT of water. Gallons! I built a condensation trap - inverted P-trap - and the water drains back to the PVC ahead of the electric fan to protect it, but I do not want the water to freeze solid and plug the drain tube.) I was doing the on/off switching manually... monitoring the temp and flipping the breaker off and on. The Ink Bird automates this. Sensor cable could be a bit longer, but it reaches just fine because I planned it to be mounted as high on the wall as possible. The Budd box I stuck it in is nice, too, but 2x the price of the controller! LOL Still a good deal. The manual is a little confusing and I can see why some report the wiring diagram is incorrect, but it is not; at least not the one that I got. It is crudely drawn, but it was correct. I played with it on the bench and made some notes so that I made sure I understood which contacts I wanted to use and how to program it properly... using a hair dryer to warm and cool sensor for triggering the relays and an ohm meter to monitor contacts. You can offset the temperature display a few degrees to calibrate it to a known temperature. My garage attic is the same temperature before sunup as outside temp and I made it agree with local weather which matches my car temp and the Ink Bird and another remote thermometer I was using to switch manually. It’s been in operation for a couple months with no hiccups. I check to make sure it isn’t “getting hot” or anything, too. I admit I was skeptical and had low expectations but have high praise now... if it keeps working for a few years even, I’ll be happy. Received it quickly and in protective packaging with everything needed... except the Budd enclosure, of course.
E**.
Accurate and economic replacement for a failed mechanical thermostat
I purchased the ITC-1000F digital temperature controller to replace a failed mechanical controller in a wine cooler. Doing the research, I read many reviews, especially the one and two stars. I was concerned that this might not be a long term solution but at the price point, it was worth the risk. Thanks to Amazon Prime, I received the device a day earlier than expected. It was packaged well and appeared to be well constructed for such a low price. The part I was replacing cost about $150.00 and this cooler has has had three of these in the last ten years! The instructions that came with the unit were poorly written. In fact, there was a supplement that showed a different wiring diagram than what is printed on the unit. Before installing the unit into the cooler, I wired it temporarily to make sure that it worked correctly. The mechanical thermostat had two wires as it was a switch. I found the line wire and the load wire. These were connected to terminals one and two with jumper wires to 7 and 8, which were for the cooling mode. The temporary connections turned on because the temperature was much higher than the set temperature; cooled the cooler down ;and then shut off the compressor when it reached the set point. SUCCESS! After this, I cut a hole into the cooler grill to mount the unit and wired it for the permanent installation. By the time I completed this, the temperature was several degrees above the set point. I turned the unit but the compressor never started. FAILURE! I contacted Ink-Bird at the "support" and "cs" email addresses and gave them detailed information on the installation and the failure. Even though the website states they would try to respond in 24 hours, I did not hear back until the third day and they only sent me a wiring diagram while ignoring my questions. By then, I diagnosed that the switch on the 7&8 terminals was not working. THANK YOU AMAZON! I contacted Amazon, explained the problem and they had a replacement unit to me in one day! I wired the new unit temporarily and it worked immediately. This time I left it this way until the unit had cycled several times until the next morning. I installed it permanently and it has run perfectly for four days. SUCCESS! The temperature controls are accurate and needed no calibration. The settings are precise and the differential settings keep the compressor from being overworked. If the unit lasts, I will be really pleased.
T**H
Perfect for controlling the temperature of my homebrew fermentation chamber
SUMMARY It is really amazing what this little device can do for the very reasonable cost it is currently selling for. Although I could have gone with the standard STC-1000 model in celcius, I enjoy looking up at my control box and knowing exactly what temperature is inside the freezer (no calculations or estimations). I would recommend this to anyone else looking for an inexpensive and easy way to control a fermentation chamber. FULL REVIEW I use this controller together with a Lasko #100 MyHeat Personal Ceramic Heater in a upright deep freezer to control the fermentation temperature of my homebrews. Because the ambient temperature of my basement is always below the target for my beer (not doing lagers so far) I only use the "HOT" side of my controller and leave the freezer unplugged. It works great for me in this setting. Also if I want I always have the option to add "COLD" control at a later time with a few more wires. The packaging for the controller is very nice. I couldn't believe how small this thing is (in a good way). Unpacking it you find the controller, the temperature probe, and a manual. The manual tells you what size hole you need to cut should you be mounting this into a project box as I was. The wiring diagram is adequate. If you find it confusing there are 1000 more on the internet that you can reference. I had mine wired up in about 10 minutes and I am in no way an expert in these type of things. The unit fired right up showing *C. I had a friend over to read me the manual as I switched settings but it is pretty intuitive and I actually figured everything out before he read it aloud. I would compare its function to changing the clock in a car. Once you figure out which buttons do what and how, it seems so obvious. I have mine set at 67*F with a +/- 2*F allowed range. It has been running smoothly for about a week. I have the probe taped to the outside of one of my fermentation buckets with bubble wrap over it to try to capture the beer temperature as close as possible. I have a liquid crystal thermometer also attached to the bucket and the two readings have matched with in 1*F every time I've checked.
H**Y
Solid digital thermostat
Sheesh. Whatever passes for Madison Ave in China got a hold on the manual for this. Pseudo engineering Jaberwocky for what is a robust simple device. This performs two functions, closes a relay designated cooling if temperature rises above setpoint + "differential"; for which you may read " the highest temperature excursion above where I want it to be". The other function designated heating works the same way but opposite:" lowest temperature excursion below where I want it to be." The cooling function also features a programable delay before that relay closes if you so desire. Why all this and not just on and off ? Well, its clearly designed for HVAC compressors. Read fridge, freezer, air conditioner. Which in the real world all just blow cold air at one temperature. So when you set your room Tstat for 73, you do not get air blowing out at 73, but lower. After awhile the temp drops to below 73 and the beast shuts down.; Then things warm up above 73 and the cycle starts again. So the room temp "desired" at 73 actually ranges a couple of degrees above and below your setpoint. On the Ibird you choose setpoint and reasonable excursion. For a fridge this might be 34, ie above freezing and a differential of 6 ie: no higher than "unsafe for food zone" above 40. This is exactly how the cold control in fridge works. You could set the Ibird for 34, no differential, but your compressor would basically run all the time. Now, pop the door root around for a beer, warm air rushes in hits the thermistor sensor and the compressor wants to start again, fair enough, but the actual temp of the whole fridge compartment did not really rise much. So a compressor delay of a few minutes saves some bucks. Actually a lot of bucks if people keep going in and out ( of fridge or house) because now the compressor wants to cycle frequently, which is bad because there is a minimum off time the manufacturer specs before power should be applied. Ignore it and pay for a new compressor. Pro: works well, easy to program. Con: the usual low current screw down connectors, ok for 110 volt in and thermistor, no way to get 10 amps in and out of the relays. FWIW, I pulled cover, relays actually say 15 Amps @ 115. Do not believe it. Add an outboard relay capable of providing full inrush current rating of your compressor and use those built in relays and the wimp connector to trigger the outboard relays. Got mine for $0.99 at electronic goldmine.
P**N
Nice replacement for dehumidifier de-icer thermostat
Used it to replace the defective bi-metal de-icer thermostat in our 27yr old Whirlpool AD40G1 dehumidifier which we couldn’t find parts for. Attached the unit to the dehumidifier’s case (made the enclosure on a 3d printer) and connected the power leads to the dehumidifier’s 110v power. Wrapped the included temperature sensor & a portion of the condenser coil inside copper foil tape and secured it with a pipe clamp. We used the operating specs printed on the original thermostat to program it. It’s been working great for over a month now & saved us over $200 buying a new dehumidifier.
G**E
I used this as a direct replacement for the mechanical thermostat.
My old thermostat would not let the fridge get cold enough, so mounting this in an external box was not a solution. Instead, I used this as a direct replacement for the mechanical thermostat on my "kegerator" refrigerator. It was pretty simple. There is a set of relay contacts for the cool function, I connected the two wires going to the old thermostat to them. The thermostat also needs power. I used two #16 Guage wire to tap power off of the hot and neutral power cord where it came into the back of the fridge. I soldered the wires together for a better connection. Finally, I connected the two wires for the temperature probe. There was a hole where the original thermostat probe entered the interior of the fridge. I was lucky enough to be able to slide the new probe through. The probe wire was way too long for my needs. I trimmed off 4 feet without any issues. I plugged it in, I selected degrees F, and set my temperature for 36 degrees. This is 10 degrees cooler than I have been getting. It came on, cooled to the indicated temperature, and turned off. I've been running it for several days now and my beer is frosty cold. For the $16 I spent, I think I'll buy a 2nd one for backup. I cut a rectangular hole in the side of my fridge where it entered into the compressor housing. It would be nice to make sure I have something that will fit the hole if I need it later. *****Update****** I'm glad I bought a 2nd one. The first one worked great for about 4 months. Then it became erratic, reporting dramatic temperature changes. At one point it decided it was at -157 degrees F and went into heat mode. It started beeping at me. I will buy another one for backup and hope I don't need it.
E**A
Excelente producto
Excelente producto, los materiales de muy buena calidad, funciona muy bien para control automático de ventiladores para mi acuario.
M**L
Great replacement/upgrade for traditional mechanical fridge thermostat.
Great replacement/upgrade for traditional mechanical fridge thermostat. The mechanical thermostat on my fridge failed. Original piece was no longer available at a reasonable price, so I got a universal replacement. It seemed to work, but had a terrible hysteresis....meaning it would run the compressor until the fridge was cooled to the desired 2 degrees C, but would only turn the compressor back ON again when the fridge temperature rose to a balmy 8 or 9 degrees C. I found this wide margin between compressor OFF and ON temperatures to be unacceptable. I stumbled upon this Inkbird ITC-1000 unit by accident and was skeptical at first but decided to give it a try. VERY VERY pleasantly surprised !!! It is compact, and once you understand the programming functions and parameters it is very easy to use. I had to read the instructions a couple of times but after that it was a breeze. Wiring the unit is simple. Power cord, sensor, and in my case, 2 wires to the compressor control wires. I tested the compressor running current and it's about 2 amps.....the ITC-1000 relay contacts have a spec of 10 amps, so no problem there. The unit has been running without issues for a few weeks now. I have set the temperature ("ts" in the programming menu) to 2 degrees C , and the delta ("ds" in the programming menu) to 2 degrees C. So, the compressor will run until the fridge cools to 2 degrees C, then switches OFF. It switches ON again when the temperature rises to 4 degrees C, which is "ts" plus "ds", and starts to cool again. Overall this is an excellent unit and is cost effective as well. HIGHLY RECOMMENDED.
R**Z
Bueno
Esta bien y los diagramas te ayudan a la instalación solo que la configuración es un poco complicada.
G**G
Just a great little product
Remarkable product for the price. Easy to use and install. We have a Sub-Zero Wine Cooler. The analog thermostat is no longer available from Sub-Zero or the thermostat manufacturer. I bought this controller, tested it and it worked perfectly. It’s actually a tremendous upgrade. Now I can control the temperature to within 1° and I can see what the temperature is at any time. Before I just had a rotating knob analog thermostat that failed every few years. Note that I had to cut the steel mounting bracket and front cover to install this digital thermostat. It needs AC power which can be either run separately or spliced in from line in to fridge. Another great feature is that you can set a temperature delta and a compressor delay. Temperature delta means that if you set a delta of 3° for example, and set target to 50°F it won’t turn on until it hits 53°. A compressor delay means that you can set a delay so that the compressor doesn’t burn out by cycling on and off too quickly. Both settings will reduce energy and extend life of compressor potentially.
A**N
Works as advertised
Works as advertised, love the adjustable temperature sensitivity!
Trustpilot
3 weeks ago
2 months ago